
|
Web Page Design Module 1: Creating Web Pages with HTML Tags |
|
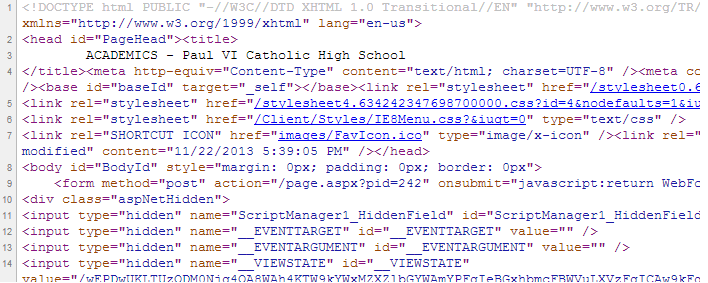
What is HTML? One good thing about learning HTML is that you can see how others have used it to design a web page. You can see the HTML source of any page you are viewing by looking at their source code. On most browsers this is accomplished by selecting File | View Source. These are the tags that are behind the index page of the Paul VI website, but you really don’t have to use that many tags to create a simple web page. |
|
 |
|
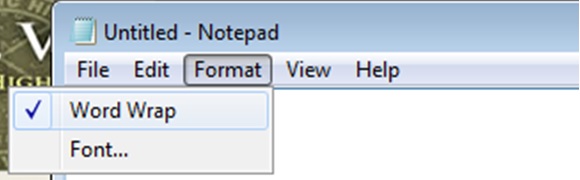
Most people use a text editor to create a web page using html tags. We will use Notepad as our text editor. To find Notepad click on the Start button and type Notepad in the text box. Notepad should appear in your list of programs. I suggest you pin it to either your Start Menu or Task Bar so you have easy access to it for this assignment. After opening Notepad, expand your screen. It is always a good idea to check a few settings before you begin. Select Format from the menu bar. Make sure there is a checkmark in front of Word Wrap. If you want to adjust the Font you can select Font and change the Font Face, style, or size. Select OK when you are finished making your selections. |
|
 |
|
Take a picture of your settings by holding down the Fn key on the bottom row of your keyboard and selecting the Prt Sc on the top row of your keyboard. You can also use the snipping tool. Open your Google Classroom and find this assignment. Paste this picture into a Google Doc and select Turn In before continuing with the next section, The Anatomy of Tags and Files. If you need assistance completing this exercise preview the Screen Captured Video. You can also find a link to this video on your Student Resources page. |
|